
What is the BIOS, how and in what cases to use it?
- BIOS and UEFI: what's the difference
- How to access BIOS or UEFI settings
- How to change BIOS or UEFI settings
Read how to access BIOS or UEFI settings and how to change their settings . Bios computer is the first thing that is loaded during computer startup. It initializes the hardware before loading the operating system from a hard disk or other device. Many low-level computer system settings are only available in the BIOS. Modern computers basically already come with UEFI which is the receiver of the traditional BIOS. But these firmware have a lot in common. Sometimes even the UEFI interface is difficult to distinguish from the BIOS. 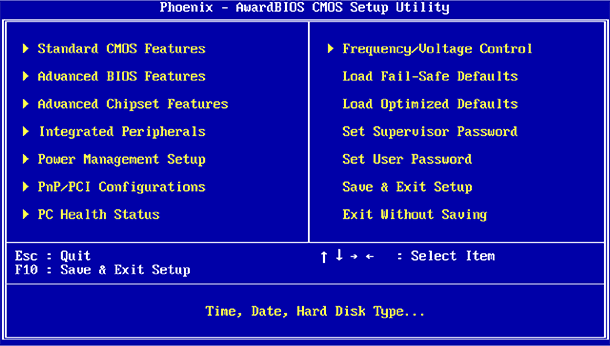 Content:
- BIOS and UEFI: what's the difference.
- How to access BIOS or UEFI settings.
- How to change the BIOS or UEFI settings.
BIOS and UEFI: what's the difference
BIOS stands for “Basic Input / Output System” ( “Basic Input / Output System” ) and is a firmware stored on a chip on a computer's motherboard. When you turn on the computer, before it starts to load the operating system from the hard disk, a BIOS is loaded that performs testing of the computer hardware.
UEFI stands for “Unified Extensible Firmware Interface” ( “Extensible Firmware Interface” ), which replaces the traditional BIOS. This firmware interface supports boot partitions larger than 2 TB, more than four partitions on one hard disk, loads faster and has more modern functions and features. For example, only systems with UEFI support the “Secure Boot” function, which prevents hacking and unauthorized use of the OS, protects the boot process from rootkits.
Under normal computer use, the user does not have the BIOS on the computer or UEFI. Both interfaces control the low-level functions of the equipment and start up when the computer starts, designed to correctly initialize the hardware when the system is turned on. Both have interfaces with which you can change a large number of system settings. For example, set the boot order, adjust overclocking settings, protect the computer with a boot password, activate hardware support for virtualization, as well as other low-level features.
How to access BIOS or UEFI settings
Different computers have different ways to access the BIOS or UEFI. But, in any case, you need to restart the computer. To get to the BIOS menu, you must press a certain key while the computer is booting. As a rule, which key you need to press is indicated on the boot screen of the computer: “Press F2 to access BIOS” , “Press <DEL> to enter setup” , or the like. : Del, F1, F2, F10 or Esc.
Often, to get to UEFI you need to press the same keys as for the BIOS. But in order to know for sure, it is better to familiarize yourself with the manual of your computer or motherboard.
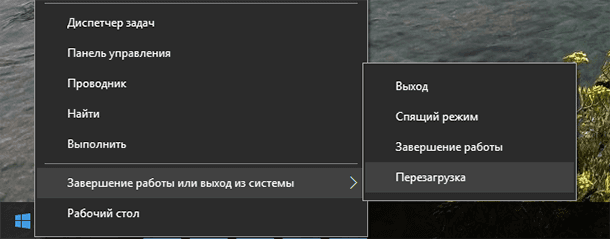
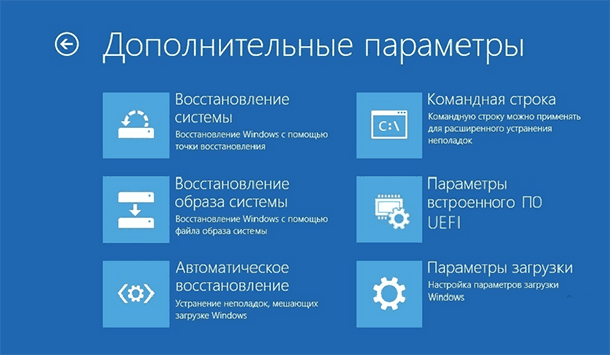
On computers with Windows 8 or 10, you may need to go to the boot menu to access UEFI. To do this, select “Restart” in the Start menu of your computer while holding down the Shift key.
The computer will reboot in a special boot menu in which you select Diagnostics / Advanced Options / UEFI Firmware Parameters .
How to change BIOS or UEFI settings
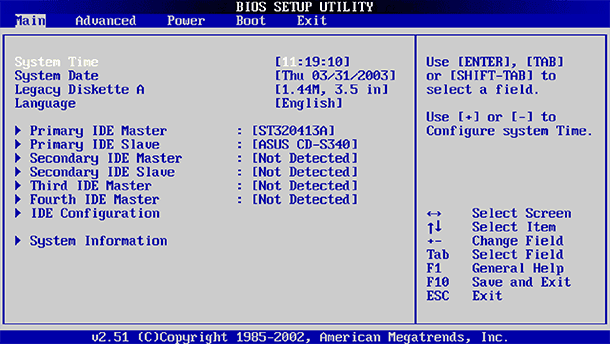
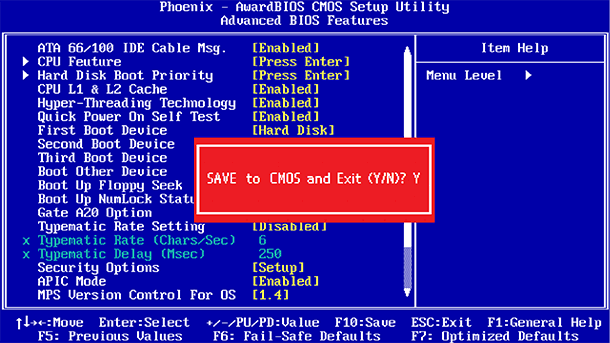
As we mentioned above, the appearance of the BIOS or UEFI menu on different computers may differ. The BIOS has a text interface that can only be navigated using the arrow keys, and making a selection by pressing the Enter key. The keys that can be used in the menu in which you are located are indicated at the bottom of the screen or to the right (depending on the firmware configuration).
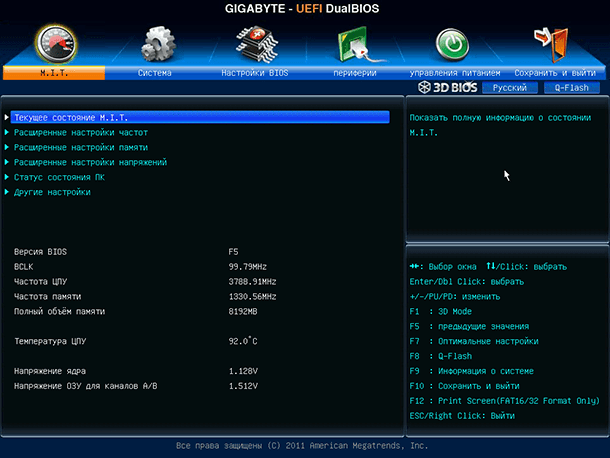
UEFI usually has a graphical interface through which you can navigate using the mouse and / or keyboard. But many computers still use the text interface, even with UEFI.
Be careful in the BIOS or UEFI menu and make changes to the settings only if you are sure of what you are doing. By making changes to certain settings (especially overclocking), you can make the computer unstable or even damage the equipment.
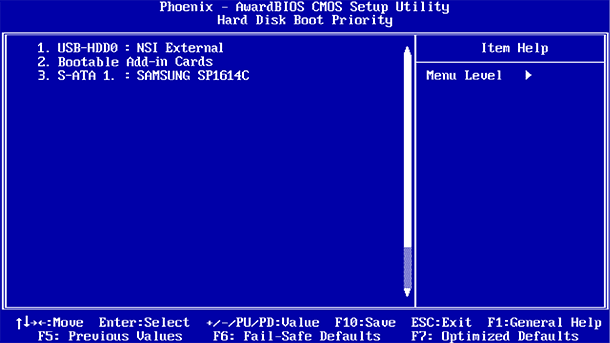
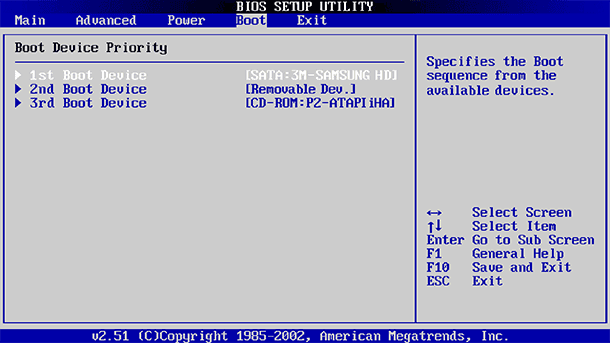
Some settings are less dangerous than others. For example, changing the boot order (Boot Order or Boot Device Priority) is less risky, but as a result they can be difficult. If you change the boot order and remove the hard disk from the list of boot devices, then Windows will not boot on the computer until its order is restored.
Even if you know exactly what you are looking for, on different computers, on different BIOS and UEFI, the same menu can be in different places and have a different look. Therefore, it is better to use supporting information for each menu, which decodes what a particular menu means.
For example, the “Enable Intel's VT-x Virtualization Technology” menu is usually located somewhere in the “Chipset” menu. But on some computers it is necessary to look for it in the “System Configuration” menu. This menu is usually referred to as “Virtualization Technology” , but may also be called “Intel Virtualization Technology , ” “Intel VT-x , ” “Virtualization Extensions,” or “Vanderpool,” etc.
If you cannot find the necessary menu in your BIOS, then look at the manual for your computer, motherboard, or on the manufacturer's website.
After the necessary settings have been made, you must select “Save Changes” to save the changes and restart the computer. You can also select “Discard Changes” to restart your computer without saving changes.

If after changing the settings in the computer began to experience problems, then try to find in the BIOS or UEFI menu item which is called “Reset to Default Settings” or “Load Setup Defaults” . Thus, the BIOS or UEFI settings will be reset to those that are set by the manufacturer by default, canceling all changes made by the user.